Time Tracker - How to log and track time on a task
The time tracker app is a great way to log the time it takes to work on a task. You can add the minutes, hours, or days that you spent working on the task so that you can see where your time is being spent.
Time tracking is a Premium (paid) feature available with select Workast plans. For information on our plans, click here.
Adding the time tracker extension to your space
To get started, you will need to add the "Time Tracker" integration to your Space.
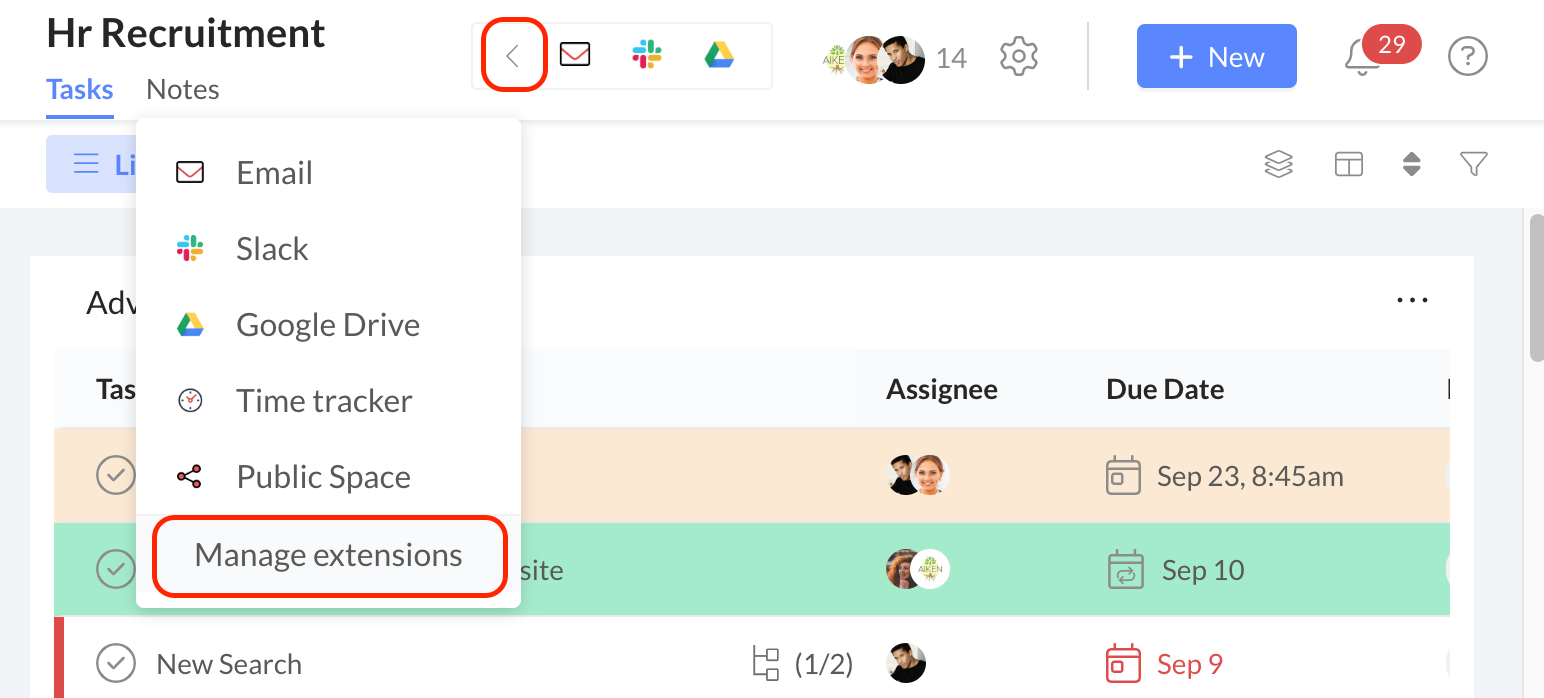
On the top right-hand corner, click on the extensions menu (either a plus sign (+) or an arrow if you have three or more extensions), and select "Manage extensions".


This will open the extensions menu. Click "Add" under the Time Tracker then click on the X in the top right corner to close the menu.

The time tracker app must be added to each space individually. If at any time you'd like to remove the app from your space, click on the app menu again, and select "Remove" next to Time Tracker.
How to log time
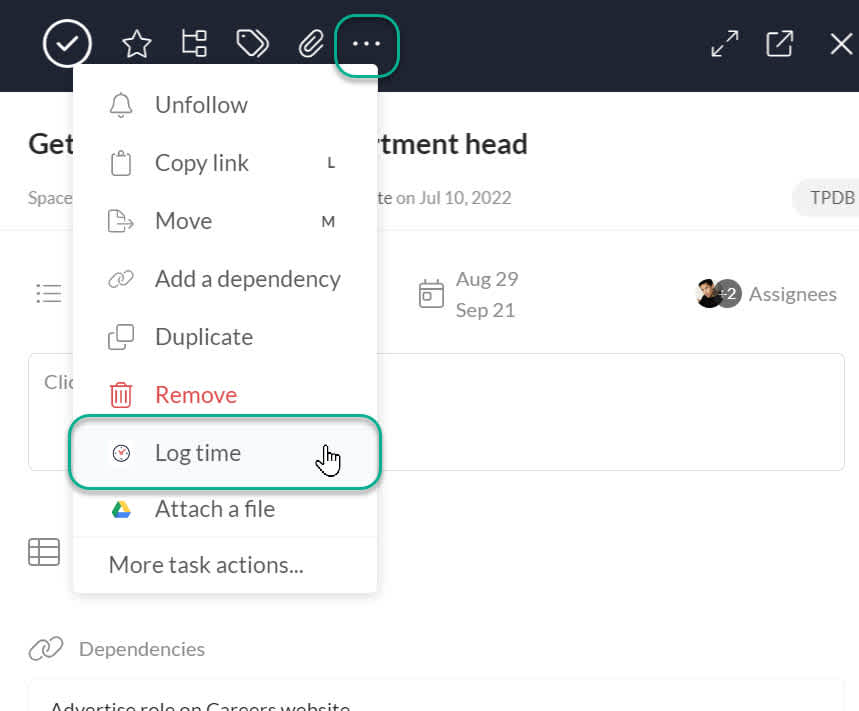
To use the time tracker, click on the task in which you'd like to log time. Click on the task menu button (ellipses - the three dots) and select "log time".

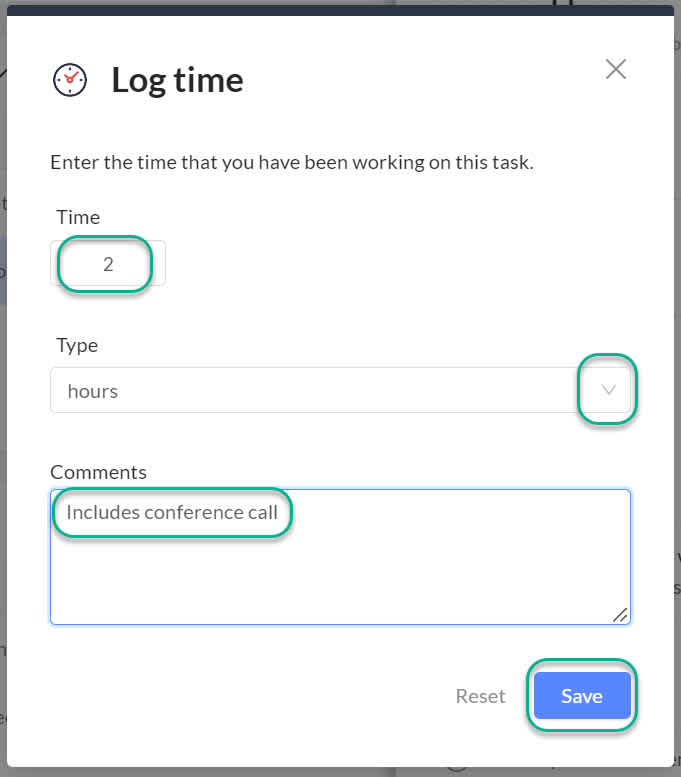
The dialogue will open. Add the time spent on the task. The default time unit is hours, but you can click on the arrow next to "hours" to change the unit to minutes or days.
Add any comments and click on "Save". To reset the information, click "Reset".

Time will be logged and shown on the task as follows:

To remove logged time:
To remove time that has been logged, click on the task. Hover your mouse over the tracked time that you'd like to delete until a red X appears in the right corner. Click on the X to delete the logged time. A confirmation dialogue will appear, click "Yes" to confirm removing the tracked time.
Downloading your logged time report:
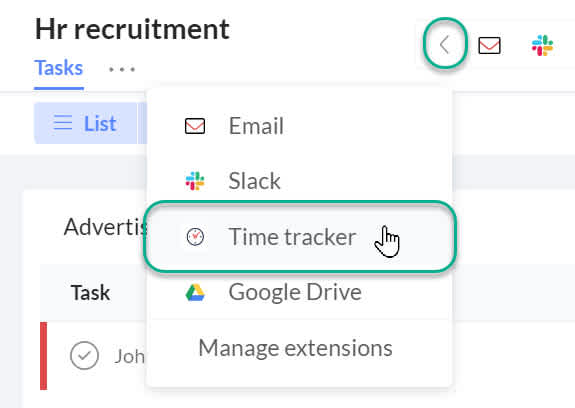
To export your logged time, click on the extensions menu (an arrow) in the top right-hand corner of your space. Select "Time Tracker". If you see the clock icon at the top of your space, you can click on that as well.


This will open up the download dialogue.
Click on the arrow down to "Tasks from" to select your the reports from that space or all spaces.
Enter the email where you want to receive the report.
Click on the start date and end date to choose the date range for your report. Select the dates on the calendar, using the arrow keys to scroll between months.
Click "Create" to generate your report as a CSV file. You can then save it, and import it into a spreadsheet program. The time listed in the time tracker report is automatically converted into minutes.
To learn how to create Meetings with Workast, click here. To learn how to use our Calendar sync extension, click here.